Prompt Generation and Data Integration in Power Platform Copilot Studio
- Tristan Danic

- Mar 23, 2025
- 3 min read

Introduction
🏴☠️
Ahoy, matey! Let's set sail on the seas of prompt generation and data integration in Power Platform Copilot Studio. This article be your treasure map, guiding ye through the process of crafting prompts and integrating data directly within 'em, with references to the Model Context Protocol (MCP). So, hoist the Jolly Roger and let's embark on this adventure!
🏴☠️
Setting Up Your Environment
To maintain proper governance around your Copilot Studio agents and prompts, use a dedicated environment and specific solutions. For this example, we'll use a developer environment (E-SORRVIGG-DEV) and a dedicated solution named sol_Demo.
Accessing Your Prompts
You can access your prompts in two ways:
Via an Agent
Go to Copilot Studio and select your solution.

Open or create a new agent.


Create a new prompt within your topic, integrating it directly within your agent.


Via Tools
Use the "Tools" option to associate your prompt with an agent.


My recommendation is to do it this way as it allows to share it with multiple agents if necessary.
Naming Convention
Naming your prompt is crucial for differentiation. Use the format: prompt_[Project as a quadrigram]_[Description]. For example: prompt_DEPR_ReturnAuthorityJson.
Setting Up Inputs and Outputs
To create an input:
Type “/” and select a text or image/document (in preview), or click on “Add”.

You can also find the “Input” option on the right side of your screen.

Create a Text Input named Query and provide sample data.

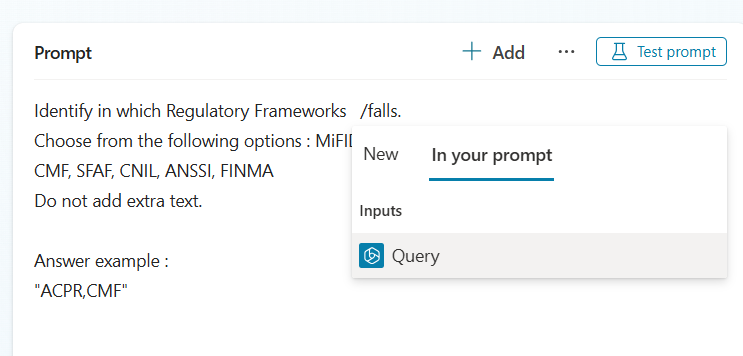
Scenario
We want our prompt to be able to analyse what law has been typed by the user (the Input), check under which regulatory frameworks it falls and to check in our data (in this case a dataverse table) the relevant Authorities linked to it. It has to return a JSON.
To make sure to return a proper formatting, you can specify or give to the prompt an example.
Add your variables directly in the prompt as you type or select them from existing ones.
Prompt Settings
Review your prompt settings:
Temperature: Lower temperatures lead to predictable results, while higher temperatures allow more diverse or creative responses.
Number of records retrieved: Adjust based on your knowledge sources.
Model used: Select the appropriate model for generating responses, considering licensing.

Include links: Decide whether to include links in your response.

Adding Data
Focus on your Dataverse:
Create a table with your data in the solution.

Add data to the table.

Add the action to return data from the table to your prompt.


Testing and Tweaking
Test the end result and make necessary adjustments. You can filter your knowledge base or include other datasets using inputs and the Knowledge panel.

And then tweaked a bit 😉 before saving and sharing it in relevant Agents!

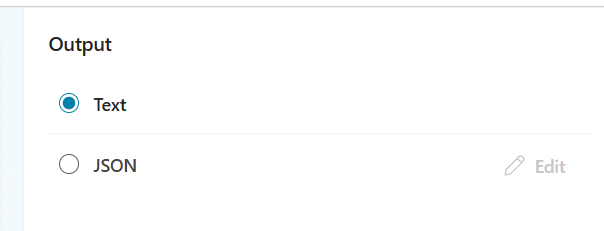
Edit and customize your JSON
Go to the Output and select JSON


Implementing in Agent Topics
Add an action and pick your prompt.

Set the result as a variable and parse it.
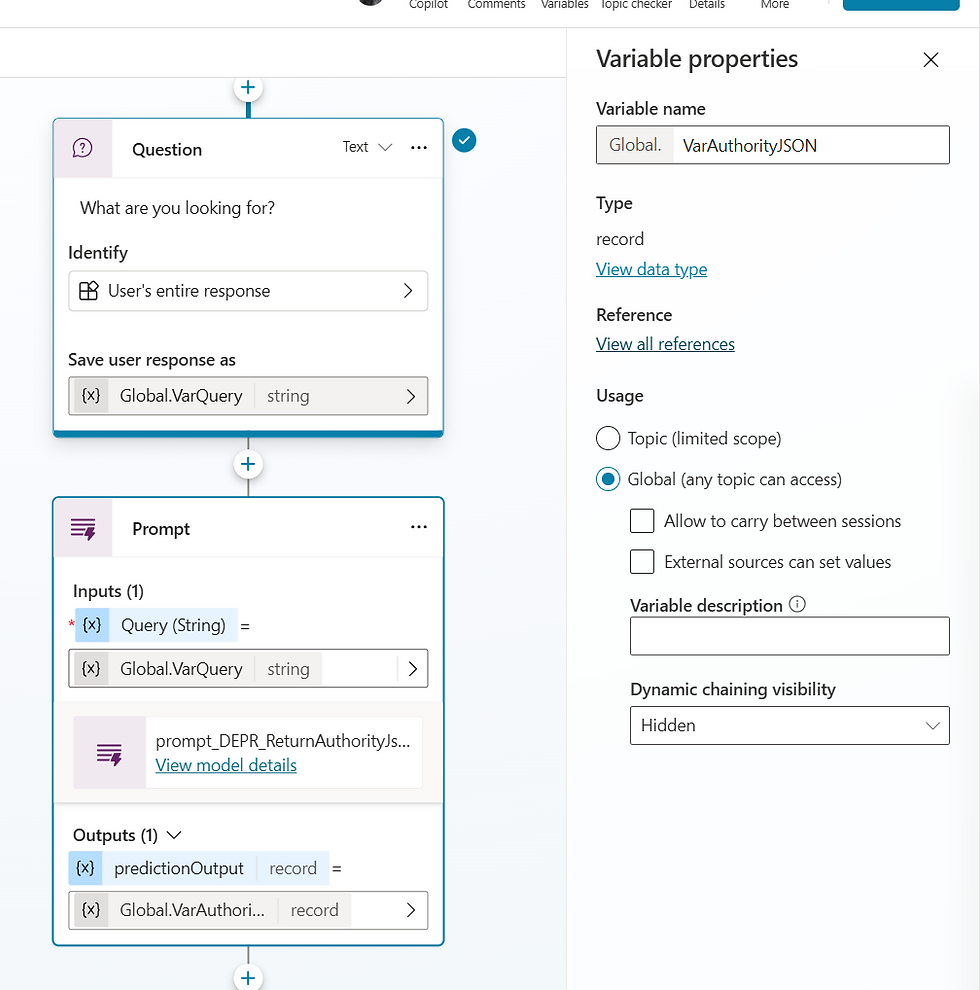
Use “Get schema from sample JSON” for the data type and paste your test.


Best Practices and Tips
Governance: Ensure that your environment and solutions are well-governed to maintain security and compliance.
Documentation: Keep thorough documentation of your prompts and their configurations for future reference and troubleshooting.
Collaboration: Work closely with your team to share insights and improve prompt effectiveness.
Testing: Regularly test your prompts in different scenarios to ensure they perform as expected.
Optimization: Continuously optimize your prompts based on user feedback and performance metrics.
Conclusion
After ye be settin' up, tunin', and adaptin' the JSON, ye can hoist it into yer agent topics. May ye have a grand ol' time creatin' and refin' yer prompts, and may the winds of fortune favor yer sails! 🏴☠️


Comments